做毕设用到了ROS,这里记录ROS相关知识;
语言基于Python,因为C++短时间学不起来,Python的话还能懂一些;
工作空间构建
创建一个新的文档夹 我们创建一个新的文档夹作为新的工作空间的开始 给每个新的工作空间创建一个新的文档夹是一个好习惯,取上面名字无关紧要,但是最好能从这个名字上看出这个工作空间是干什么的,例如main_ws,(主要工作空间):
mkdir main_ws
将功能包放入src也是一个比较好的习惯,我们创建一个工作空间同时创建一个src文档夹,然后进入这个文档夹内:
mkdir main_ws/src
cd main_ws/src
与ROS1不同,ROS2的工作空间并不需要init;
自定义包
如何在ROS2中创建一个功能包呢?我们可以使用这个指令:
$ ros2 pkg create --build-type
在ros2命令中:
pkg:表示功能包相关的功能;
create:表示创建功能包;
build-type:表示新创建的功能包是C++还是Python的,如果使用C++或者C,那这里就跟ament_cmake,如果使用Python,就跟ament_python;
package_name:新建功能包的名字。
比如在终端中分别创建C++和Python版本的功能包:
cd ~/main_ws/src
ros2 pkg create --build-type ament_cmake learning_pkg_c               # C++
ros2 pkg create --build-type ament_python learning_pkg_python # Python
对于Python包:
只需要进到构建的包文件夹中,进入与上一层文件夹名字相同的包中即可,然后写入源文件;
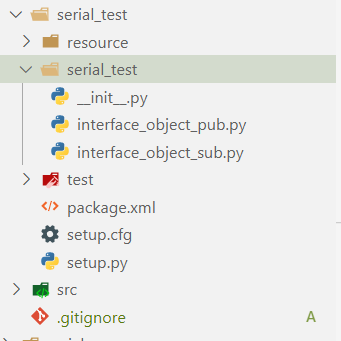
然后修改package.xml文件:
from setuptools import setup

package_name = 'serial_test'

setup(
    name=package_name,
    version='0.0.0',
    packages=[package_name],
    data_files=[
        ('share/ament_index/resource_index/packages',
            ['resource/' + package_name]),
        ('share/' + package_name, ['package.xml']),
    ],
    install_requires=['setuptools'],
    zip_safe=True,
    maintainer='xioafei',
    maintainer_email='2253770787@qq.com',
    description='TODO: Package description',
    license='TODO: License declaration',
    tests_require=['pytest'],
    entry_points={
        'console_scripts': [
         'interface_object_pub  = serial_test.interface_object_pub:main',
        #  'interface_object_sub  = serial_test.interface_object_sub:main',
        ],
    },
)
编译功能包
在创建好的功能包中,我们可以继续完成代码的编写,之后需要编译和配置环境变量,才能正常运行:
cd ~/main_ws  #在工作空间的根目录编译
colcon build  #编译工作空间所有功能包
colcon build --packages-select 包名#编译特定的包
编译成功后,需要source一下,才能让ros识别到这个包:
注意,最好新开一个终端,而不是在当前终端;
source install/local_setup.bash
关于sourceros1和ros2有很大的不同,在install目录下会有local_setup 和setup两个文档。local_setup只会把当前工作空间中的可用包添加到环境当中,setup则会把新建该工作空间时候的底层的工作空间也加入到环境当中,这样就可用同时使用两个工作空间中的包; 因此,先sourceROS2安装时系统的setup,然后再source main_ws的local_setup,和source main_ws的setup的效果是相同的,应为main_ws这个工作空间的创建时的底层就是系统的setup; 对于存在多个工作空间的情况这种区别就会体现出来,官网对于新的工作空间叫overlay,也就是这个一个每个工作空间之间是存在覆盖累计的情况; 个人推荐首先source系统,然后对于自己创建的工作空间选择local_setup这样就会减少自己创建的多个工作空间之间的干扰。这解决了ros1上一个很头疼的问题;
自定义数据类型
在ROS2中定义接口,需要编写一个接口文档,该文档后缀为msg、srv、action
在接口文档中定义通信过程中所使用的数据类型和数据名称;
数据类型有哪些呢?
原始的数据类型只有九类,其中每一个都可以在后面加上[]将其变成数组形式(从一个变成多个)
bool
byte
char
float32, float64
int8, uint8
int16, uint16
int32, uint32
int64, uint64
string
使用以下命令可以查看数据组成:
ros2 interface show point_msgs/msg/Ds18b20

如何自定义数据类型呢?
对于话题接口的定义:
你会、在包里面创建定制化的.msg和.srv文档,并且它们可在别的包内使用.所涉及的包应该放到同一工作空间下面.
建立一个新的包:
ros2 pkg create --build-type ament_cmake tutorial_interfaces
tutorial_interfaces是新包的名字.注意这是一个CMake类型的包;在单纯python包里面,目前是没有办法生成.msg或者.srv文档的.在CMake型包里面,你可以创建定制化接口,然后在python型节点中使用;
在一个包中,最后是让.msg 和.srv放在各自文档目录比较好.在目录main_ws/src/tutorial_interfaces创建文档夹:
mkdir msg
mkdir srv
在刚刚创建的tutorial_interfaces/msg文档目录,新建一个名字为Ds18b20.msg的文档,里面放着声明数据结构的一行代码:
int32 temp1      # 表示第1个温度
int32 temp2      # 表示第2个温度
int32 temp3      # 表示第1个温度
int32 temp4      # 表示第2个温度
int32 temp5      # 表示第1个温度
int32 temp6      # 表示第2个温度
int32 temp7      # 表示第1个温度
int32 temp8      # 表示第2个温度
将八个32位整数称为temp1~8,这就是你的定制化消息;
3.3 CMakeLists.txt 为了将你定义的接口转为特定语言代码(如c++和python),使得这些接口可在这些语言里被使用,(为了达到这个目地你)
参考CMakeLists.txt文档:
cmake_minimum_required(VERSION 3.8)
project(point_msgs)

# Default to C99
if(NOT CMAKE_C_STANDARD)
  set(CMAKE_C_STANDARD 99)
endif()

# Default to C++14
if(NOT CMAKE_CXX_STANDARD)
  set(CMAKE_CXX_STANDARD 14)
endif()

if(CMAKE_COMPILER_IS_GNUCXX OR CMAKE_CXX_COMPILER_ID MATCHES "Clang")
  add_compile_options(-Wall -Wextra -Wpedantic)
endif()

# find dependencies
find_package(ament_cmake REQUIRED)
# uncomment the following section in order to fill in
# further dependencies manually.
# find_package( REQUIRED)
find_package(rosidl_default_generators REQUIRED)

rosidl_generate_interfaces(${PROJECT_NAME}
  "msg/Ds18b20.msg"
 )

if(BUILD_TESTING)
  find_package(ament_lint_auto REQUIRED)
  # the following line skips the linter which checks for copyrights
  # uncomment the line when a copyright and license is not present in all source files
  #set(ament_cmake_copyright_FOUND TRUE)
  # the following line skips cpplint (only works in a git repo)
  # uncomment the line when this package is not in a git repo
  #set(ament_cmake_cpplint_FOUND TRUE)
  ament_lint_auto_find_test_dependencies()
endif()

ament_package()
参考package.xml文档:
  point_msgs
  0.0.0
  TODO: Package description
  xioafei
  TODO: License declaration

  ament_cmake

  ament_lint_auto
  ament_lint_common

  rosidl_default_generators
  rosidl_default_runtime
  rosidl_interface_packages

    ament_cmake
既然你定制化接口包的组成部分都齐了,那可以编译这个包了.在工作空间根目录(~/main_ws)下,运行下面指令:
colcon build --packages-select tutorial_interfaces
现在,这些接口可以被ros2包找到了;
在新终端,main_ws工作空间运行下面指令来source一下(该空间环境变量):
source ./install/setup.bash
现在使用ros2 interface show指令来确认你的创建的接口可以使用了.
ros2 interface show tutorial_interfaces/msg/Ds18b20
应该返回:
int32 temp1      # 表示第1个温度
int32 temp2      # 表示第2个温度
int32 temp3      # 表示第1个温度
int32 temp4      # 表示第2个温度
int32 temp5      # 表示第1个温度
int32 temp6      # 表示第2个温度
int32 temp7      # 表示第1个温度
int32 temp8      # 表示第2个温度
通过发布话题发布自定义数据
参考源码:
import rclpy                                     # ROS2 Python接口库
from rclpy.node import Node                      # ROS2 节点类
from std_msgs.msg import String                  # 字符串消息类型

from point_msgs.msg import Ds18b20  # 自定义的温度消息

"""
创建一个发布者节点
"""
class PublisherNode(Node):

    def __init__(self, name):
        super().__init__(name)                                    # ROS2节点父类初始化
        self.pub = self.create_publisher(Ds18b20, "Ds18b20_temperature", 100)# 创建发布者对象(消息类型、话题名、队列长度)
        self.timer = self.create_timer(0.1, self.timer_callback)  # 创建一个定时器(单位为秒的周期,定时执行的回调函数)

    def timer_callback(self):                                     # 创建定时器周期执行的回调函数
        temp = Ds18b20()
        temp.temp1= int(1)
        temp.temp2= int(2)
        temp.temp3= int(3)
        temp.temp4= int(4)
        temp.temp5= int(5)
        temp.temp6= int(6)
        temp.temp7= int(7)
        temp.temp8= int(8)
        self.pub.publish(temp)                              # 发布目标位置
        self.get_logger().info('Publishing: "%d"' % temp.temp1) # 输出日志信息,提示已经完成话题发布

def main(args=None):                                 # ROS2节点主入口main函数
    rclpy.init(args=args)                            # ROS2 Python接口初始化
    node = PublisherNode("interface_object_pub")     # 创建ROS2节点对象并进行初始化
    rclpy.spin(node)                                 # 循环等待ROS2退出
    node.destroy_node()                              # 销毁节点对象
    rclpy.shutdown()                                 # 关闭ROS2 Python接口
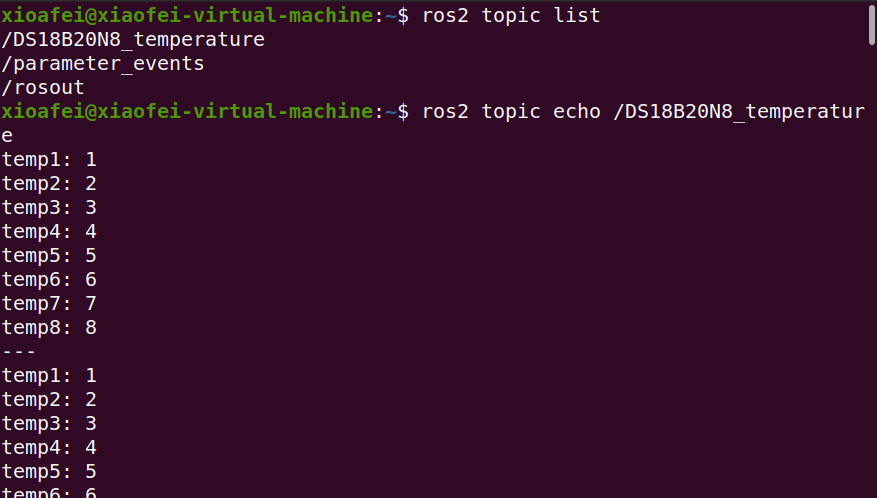
通过以下命令验证:
ros2 topilist
ros2 topic echo /DS18B20N8_temperature
通过订阅话题订阅自定义数据
参考源码:
ROS2 TurtleBot3
主机和树莓派的ROS_DOMAIN_ID要设置的一样才可以;
export ROS_DOMAIN_ID=30 #TURTLEBOT3
装ROS2 TurtleBot3 的包只需要:
sudo apt install ros-galatic-turtlebot3-*
其他的包也是类似;
[TurtleBot] 启动小车
ros2 launch turtlebot3_bringup robot.launch.py
[Remote PC] 运行键盘控制节点
ros2 run turtlebot3_teleop teleop_keyboard
[Remote PC] 启动Rviz
ros2 launch turtlebot3_bringup rviz2.launch.py
[Remote PC] 查看话题
$ ros2 topic list
/battery_state
/cmd_vel
/imu
/joint_states
/magnetic_field
/odom
/parameter_events
/robot_description
/rosout
/scan
/sensor_state
/tf
/tf_static
[Remote PC] 查看服务
ros2 service list
GAZEBO仿真
用自己做的模型替代例子包中的文件
注意点:
1、串口设备和激光雷达设备串口会干扰,且好像激光雷达默认串口ttyUSB0,因此要在开机时或者运行launch.py前拔掉自己的串口设备;
2、ros2 run nav2_map_server map_saver -f ~/map修改为:
ros2 run nav2_map_server map_saver_server -f ~/map